Custom Made Press on Nails
Back in 1997 one of TGForum’s contributors offered a solution for crossdressers who want to have beautiful nails for an evening out but can’t find press on nails that fit. Since young cisgender women with tiny fingers are the biggest market for press on nails what’s a crossdresser to do? Jayne Nicole enlisted the help of the nail techs training at her local beauty school and had them make custom acrylic nails she could save and apply with 3M double sided tape. She did not provide any photos or diagrams but she explains the process throughly. See if her technique could work for you.
Don’t Just Press On, Get Customized
By Jayne Nicole
Did you ever get really jealous of the great nails on the girl at the table next to you. She probably went to the salon and had her nails shaped and lengthened with acrylic. It requires mixing a powder acrylic with a solvent and shaping the nail with a brush. The problem for most of us is that it takes about an hour and a half and costs $25 to $40 a set. A lot of money for a night or weekend out. Then you have to have them removed for the Monday after, not always easy.
The solution is not press on nails for most of us. My thumbs especially are larger and flatter than the largest press on’s. They also don’t look quite as nice as the acrylic and tend to pop off at the worst times.
I solved the problem by having some custom press on nails made in the same manner, almost exactly, that the acrylic nails are made. In fact they are the acrylic nails, custom made for my wider and flatter fingers by a salon, with the fashion look and the economy of a press on.
To make them, first push back the cuticle and POLISH your nails to protect the nail itself. Better yet have a manicure done first. Then have the nail tech put a nail tip in acetone for a few seconds to soften it (just at the part that attaches to your nail) and apply it to your nail. The acetone will hold it like glue, but not as well. Then put a very small amount of cuticle oil on the natural nail that is still exposed, the barest amount possible — not on the tip! This will keep the acrylic from attaching to your own nail permanently.
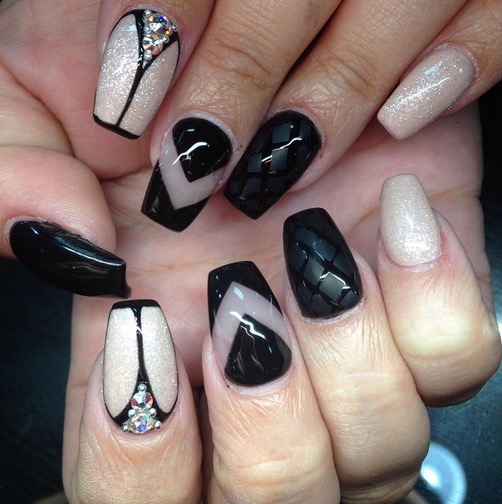
You could have acrylic nails like these made, and wear them for special nights out.
The nail tech then makes the acrylic nail the usual way, but they have to be just a little more careful when filing/shaping the nail to keep it on your finger.
When done, they push a nail tip under the new nail between your nail and the new nail (got all that?) Wiggle it carefully and it will loosen (from the sides too, but be more careful here as the acrylic is thinner and a little weaker). When loosened you just clean up the sides with some very minor filing and polish them. I store the nails on a piece of duct tape that is wrapped around a piece of wood sticky side up to hold them for polishing. It works great. You can also just put them on your fingers again and paint them as you would any nail. (golly gee *grin*)
It is a good idea to mark them on the inside or put them in a pill container correlating to your fingers. Otherwise it is hard figure out what goes where *grin*.
Remember too that whatever length your real nails are when the tips were made is about the maximum length to have them when you wear your new nails. Shorter is okay, but longer will make you look like you need a fill (they tend to center on the tip of your real nail).
To keep them on I use the double stick tabs, but you can economize and use the same material — it’s made by 3M and comes on a large roll, you cut the tabs — if you want to.
If you break one, and I have opening a car door, you can have just one made up for usually 1/10 the the cost of a full set! (ever wonder how they came up with that?) Or you can use Superglue/nail glue to piece it back together, but it won’t be quite as strong as the original. (besides it’s more fun to get another made!)
I have 3 sets, both round and square tips and prefer the square, especially with the air brushing. They don’t come off too easily either. In fact I’ve worn a set for over 24 hours, washing my hands, opening car doors (I learned how), sleeping, showering, and, heaven forbid, opening a can of soda pop! (definitely not recommended!) To take them off you will have to use another tip to pry them off, just like when they were made — just do it gently!
I’ve had mine made at a salon and at a beauty school. I had no problems telling the girls how to make the nails — they really thought it was great — and a way to “save” that special set with nail art! They actually thanked me for teaching them *grin*.
The nice thing about a beauty school is that they usually need volunteers for classes, a great way to get things done for free! They also treat regular customers to free services where I go if business is slow or there is a long wait for hair and the manicurists aren’t busy. They currently cost $15 a set at the school and $25 to $40 at a salon.
Have fun at the salon!
Like to make a comment or share a nail tip? Login here and use the comment area below.

Category: Transgender How To
About the Author (Author Profile)
Subscribe
If you enjoyed this article, subscribe to receive more just like it.