A Well-Rounded Makeup Kit: What Should I Have?
Whether you’re a makeup novice or an experienced makeup wearer, your kit should include staple items that you use routinely as well as items that will allow you to experiment and grow. Besides the obvious things like foundation and mascara, there are probably a few things that you might not have thought of. Here are the things I recommend for all levels of makeup enthusiasts:
TOOLS:
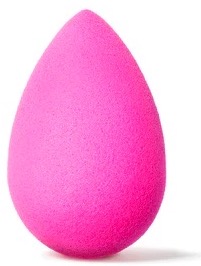
The Beautyblender.
A Good Blending Sponge: While I do prefer the one and only Beautyblender, they are expensive. A great substitute is made by Real Techniques and is the closest quality I have found to the Beautyblender. They are sold at most suppliers, including Walmart and Amazon, for a fraction of the cost.
A Good Powder Puff: I use these instead of the large powder brushes for many reasons. The big reason is that brushes only apply powder to the surface of the skin, whereas a puff lets you push the powder into the skin which allows for much better staying power. Brushes are also much messier than a puff, and we don’t like to get powder fallout all over our brand-new black dress or our makeup table.
Tiny scissors: You’ll need these for trimming false lashes, nose-hairs, and a million other things!
Long-handle sponge-wand applicators: These are so much easier to apply eyeshadow with than the tiny ones that come with your eyeshadow and they work much better than a brush for shimmery eyeshadows!
False lash applicator: If you struggle with false lashes, you should try using a false lash applicator. They come in a variety of styles but the ones that work like tweezers are the easiest. You can always find them in the dollar stores, but if you can’t find them there then you can find them just about anywhere that sells makeup.
Metal dental spatula: These are great for mixing all kinds of materials including lip colors and foundations. I use mine for so many things but the one thing I can’t do without my spatula is apply glue onto false lashes. I place two small dots of glue onto the back of my hand, one for each lash strip, and then use the spatula to apply it to the lash band.
Silicone mini makeup spatula: A Godsend for getting products out of their almost-empty containers. I don’t know about you, but I don’t like spending a fortune on foundation only to waste the last bits of it because I can’t get it out of the bottle! I’m not cheap, I’m practical!
Ceramic Tile: You’ll use these for everything! I use mine to mix all kinds of things, especially foundation. I custom-mix foundation shades for almost every client. I place my beard-cover material on it so that I can soften it with my finger before application. I also custom-mix lip color shades and a zillion other things. I would be totally lost without mine. They can be found at any hardware or homebuilder store for under a buck. If you don’t feel like going to Home Depot, then you can get this snazzy one from Amazon.
BRUSHES:
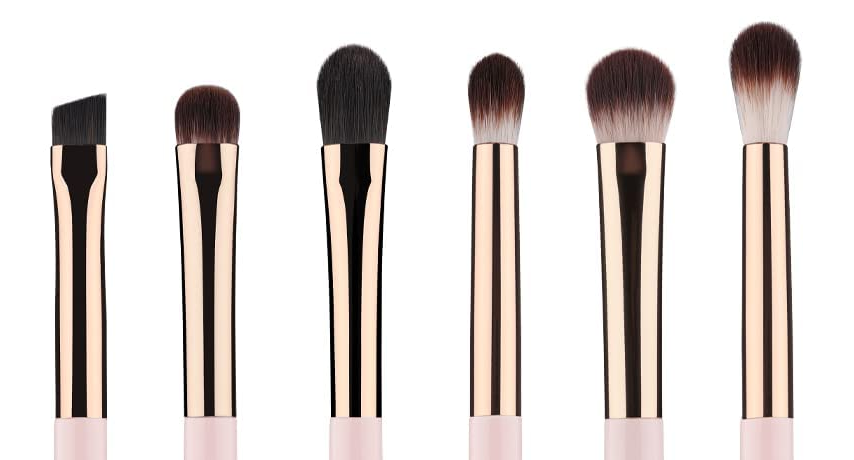
You don’t need a million brushes to do a good job with your makeup. The bare-bones brush set that I recommend for eyeshadow are a fluffy blender brush, a flat brush for lids, and a small round brush for creases. For the face I recommend one small, synthetic brush for concealer and foundation and one larger brush for contouring and blush. You’ll also need a small, angled brush for your eyebrows and a small synthetic brush for your lip color. Lastly, I use a round, pointy brush for applying several types of eyeliner. The set in this link includes all of the basic brushes you need for your eyes.
The set below are actual artist’s brushes and I use these for wet products such as lip color, eyeliner (liquid, gel, cake, etc.), concealer, foundation in small areas, and other things that are wet or creamy. The synthetic bristles handle wet materials better and will not get damaged like natural bristles will. You can get this set in the craft section of Walmart or Target, or just order from the link.
This brush is a contour brush but can also be used to apply and “buff” foundation. I listed it here because it’s important to have a good contour brush and the ones that come in those cheap sets are usually garbage.
SKIN PREPARATION:
Toner: Every makeup kit should include a bottle of toner for preparing and hydrating the skin before the makeup application. Squeeze it onto a cotton round and swipe it all around your face and neck. You’ll need three or four cotton rounds to cover the entire surface.
Moisturizer: A good moisturizer beforehand is also essential and should be allowed to completely absorb into the face and neck before you start. Remember that oily skin needs hydration too. Get a moisturizer that hydrates because oil is not the same as hydration.
FACE:
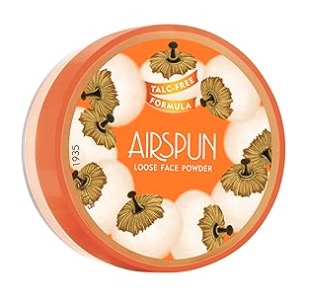
Coty powder.
Loose Powder: Obviously you need your favorite foundation, concealer (if you use it), beard-cover product, and blush, but another thing every kit should have is a canister of loose setting powder. A compact powder is great for keeping in your purse while you’re on the go, but I prefer loose powder for the main event at home. I apply loose powder with a powder puff instead of a large powder brush. My favorite is Coty Airspun.
Contour: You should also have some kind of contouring material to shape and “sculpt” your face. I use the compact powder variety. If I can’t find my normal contour brand, I will use a compact setting powder that’s two or three shades darker than my skin tone. I do not use bronzer for contouring since it almost always contains some kind of shimmer in it, and this will defeat the purpose of contouring since it’s reflective. Find something that doesn’t have any shimmer in it.
EYES:
Brows: However you prefer to fill in and shape your brows, whether it’s a pencil, pen, or eyeshadow with a brush, you should also have an eyebrow comb to shape them up before you fill them in. A pair of tweezers will also come in handy for plucking out those unruly hairs.
 Eyeliner: Eyeliner is a common staple in every makeup kit, whichever form you prefer, but something you might not know you need is a box of pointy Q-Tips! These little miracles are hard to find and must usually be ordered online. I get mine from Amazon for around $4. A pointy swab is just what you need for cleaning up eyeliner bloopers and for sharpening your lip line. I use them with a drop of micellar water for cleaning up tiny mistakes and for a razor-sharp edge of my eyeliner wing. Once you’ve mastered the pointy swab, you’ll never use a regular one again.
Eyeshadow: Every kit should have one eyeshadow palette for neutral colors and one for other colors. It’s so easy to succumb to the desire for dozens of shadow colors (I understand this!) but buying smaller palettes that contain multiple shades and finishes will save you a lot of space in your kit as well as money. Drugstore brands have really stepped up their game in recent years because they want to compete with the high-end brands, so their eyeshadows are much more pigmented and blend-able than they used to be. Brands like ELF, NYX, and Wet ‘n Wild are making some pretty good eyeshadows nowadays, so give them a try!
Neutral Shadow Palette: NYX makes a good one, but you can also try Wet ‘n Wild, L’Oreal, and many other neutral or “nude” palettes.

Colors Palette: This is taste-based of course. If you know you won’t use yellow, green, or blue shadow colors, then don’t waste your money on a palette that contains those colors. However, you can get a colors palette with more flattering colors like this one by NYX.
Liquid Shimmer Eyeshadow: I’ve always been a huge fan of liquid/crème eyeshadows, especially the shimmery ones, so imagine my joy when I found out that NYX is now making a range of liquid shadow colors. They go on wet but they dry to a soft, powdery finish, and they are waterproof! They can be worn alone or placed on top of powder shadow for an extra shine.
EYELASHES:
 Having fresh mascara in your kit is a given, and if you love falsies as much as I do, then you’ll also need a good lash adhesive. I prefer DUO but a new product has emerged onto the marketplace that I am just crazy about. It’s a lash-glue pen that doubles as eyeliner! You heard that right! It’s a black felt-tip eyeliner pen that contains adhesive. You apply it as eyeliner and then just pop the false lashes on top! It dries quickly and provides good adhesion. A little advice, though. If you struggle with applying liquid or pen eyeliners then you may not like this product. If it’s easier for you to apply the glue directly to the lash band then stick with what is easiest.
LIPS:
Have you ever bought a lipstick that was too light or too dark when you tried it on at home? Did you know that you can mix lip color to be lighter or darker? I keep tubes of lipstick around that I use just for mixing. I keep a tube of white (yes, you can buy white lipstick!), a tube of black, and assorted light pinks and nudes. Simply scrape off a small amount from the lipsticks you want to mix with your dental spatula, wipe it onto the ceramic tile, and mix with the spatula until it’s the color you want. Then just apply it to the lips with a brush. Once you’ve gotten good at mixing lip colors, you can dig out all those colors you don’t like and create new ones!
INCIDENTALS:
Baby wipes, cotton rounds, pointy Q-Tips, eyedrops, medical tape, wig caps, Chapstick, and safety pins! You might also wish to invest in a little bottle of setting spray to hold it all together. Good luck!

Category: Makeup
About the Author (Author Profile)
Cis-gender female. Professional makeup artist/ makeup instructor for TG and CD. Based in Los Angeles. I do private makeup instruction on ZOOM or in-person. ONLINE COURSES AVAILABLE. Website: TgTransitions.comSubscribe
If you enjoyed this article, subscribe to receive more just like it.